Mirai DDOS Malware Submissions on VirusTotal

Author: Vitali Kremez @VK_intel
Source: https://www.virustotal.com
Goal: Visualize and analyze all recent Mirai DDoS malware submissions on VirusTotal


Steps:
(1) Pull all of the recent Mirai malware submissions from VirusTotal, identified by the YARA signature;
(2) Push the data to ELK (Elasticsearch, Logstash, and Kibana); and
(3) Create a custom timeline dashboard with all the most recent Mirai malware hashes.

Time  first_seen   Mirai md5  
November 28th 2016, 12:49:26.000
November 28th 2016, 12:48:58.000
5849bb9ceefee5ef295e7e966d0ba2b5
November 29th 2016, 20:45:44.000
November 28th 2016, 12:25:06.000
9ba4401c2a4faa8975175498dc1fbfd4
November 28th 2016, 12:25:37.000
November 28th 2016, 12:25:06.000
9ba4401c2a4faa8975175498dc1fbfd4
November 28th 2016, 16:54:20.000
November 28th 2016, 12:25:06.000
9ba4401c2a4faa8975175498dc1fbfd4
November 24th 2016, 01:50:13.000
November 24th 2016, 01:49:39.000
bd3689a91daff90950b0f83aeb7ed503
November 23rd 2016, 10:43:12.000
November 20th 2016, 22:26:52.000
6e2002f8d9a6d372d15d9c9dbe9fe286
November 24th 2016, 14:21:42.000
November 20th 2016, 22:26:52.000
6e2002f8d9a6d372d15d9c9dbe9fe286
November 23rd 2016, 16:59:07.000
November 18th 2016, 11:49:09.000
68933ff0ead688099653de1518632a5b
November 28th 2016, 13:37:15.000
November 14th 2016, 18:17:40.000
cb2b4f743d5125cc4c1e067abc783b82
November 29th 2016, 01:56:03.000
November 5th 2016, 03:38:23.000
e8da1bab26ac3507af1c65ee3796170d
November 29th 2016, 01:55:51.000
November 5th 2016, 03:00:39.000
15adef2c484166480d3684425f1fc0b4
November 30th 2016, 04:08:32.000
October 23rd 2016, 20:36:24.000
b0f48738fddf5c14c474f4bda38d81c1

Dridex Node Tracker

Author: Vitali Kremez
Goal: Track all Dridex nodes and ingest the data into Elasticsearch, Kibana, Logstash (ELK) instance
Sourcehttps://feodotracker.abuse.ch/

Steps:
(1) Obtain the feed data using the custom scraper “dridexloader.py”;
(2) Load the data to the MySQL database;
(3) Push to the data to Elasticsearch;
(4) Create custom dashboards for the data visualization

The most recent Dridex nodes from the malware feeds are as follows:

Time C2 malware
November 18th 2016; 13:35:55.000 188.126.72.179 Dridex
November 18th 2016; 05:55:13.000 174.37.216.226 Dridex
November 18th 2016; 05:55:13.000 166.78.144.68 Dridex
November 16th 2016; 13:54:38.000 54.235.86.173 Dridex
November 15th 2016; 09:53:22.000 193.136.97.4 Dridex
November 15th 2016; 09:53:22.000 93.122.165.54 Dridex
November 11th 2016; 09:09:04.000 149.210.158.54 Dridex
November 11th 2016; 09:09:04.000 87.254.45.29 Dridex
October 27th 2016; 06:19:59.000 210.2.86.72 Dridex
October 27th 2016; 06:19:59.000 162.243.47.192 Dridex
October 26th 2016; 07:06:32.000 46.101.10.156 Dridex
October 26th 2016; 07:06:32.000 120.138.18.110 Dridex
October 26th 2016; 07:06:32.000 198.20.239.21 Dridex
October 23rd 2016; 20:07:38.000 92.222.219.26 Dridex
September 29th 2016; 08:09:00.000 23.253.210.81 Dridex
September 27th 2016; 05:46:30.000 62.108.36.240 Dridex
September 27th 2016; 05:46:30.000 132.248.49.100 Dridex
September 27th 2016; 05:46:30.000 148.251.46.169 Dridex
September 15th 2016; 02:14:31.000 50.57.75.172 Dridex
September 15th 2016; 02:14:31.000 130.88.149.87 Dridex
September 6th 2016; 13:00:07.000 109.104.92.167 Dridex

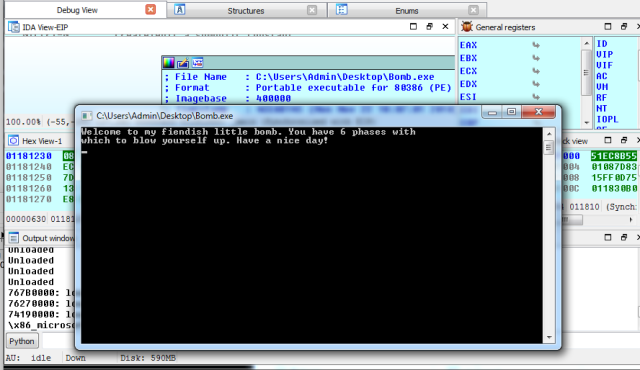
Reverse Engineering: Debugging in IDA

Sourcehttp://opensecuritytraining.info/
Tip: Press “D” to convert to data types on the “Source” or “arg” parameter.

(1) Set up a breakpoint on the “add” function right after the “sscanf” call on the fourth challenge.

(2) Pass all the necessary parameters to get to the fourth challenge.
(3) Review the windows and adjust the breakpoint
(4) Get into the “mov” function with the “Src” parameter and convert the value to data (press “D”). You see the passed values converted from hex to characters as “3[SPACE]k[SPACE]251.”

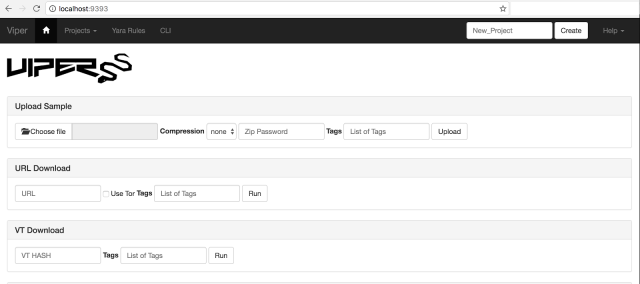
Viper Framework: Installing Malware Repository Framework

Sourcehttps://github.com/viper-framework/viper
Goal: Install a malware repository box for subsequent storage and malware triage to Cuckoo.

Steps: python viper-web

[*] Session opened
[*] DLL: MSVCRT.dll
  0x43e0e0: memset
  0x43e0e4: wcsstr
  0x43e0e8: malloc
  0x43e0ec: free
  0x43e0f0: wcslen
  0x43e0f4: wcscpy
  0x43e0f8: wcscat
  0x43e0fc: memcmp
  0x43e100: _strdup
  0x43e104: sprintf
  0x43e108: atoi
  0x43e10c: strlen
  0x43e110: strstr
  0x43e114: _strnicmp
  0x43e118: strncpy
  0x43e11c: strcmp
  0x43e120: sscanf
  0x43e124: strcpy
  0x43e128: memcpy
  0x43e12c: _wcsicmp
  0x43e130: wcsncpy
  0x43e134: localtime
  0x43e138: mktime
[*] DLL: KERNEL32.dll
  0x43e140: GetModuleHandleW
  0x43e144: HeapCreate
  0x43e148: GetProcAddress
  0x43e14c: HeapDestroy
  0x43e150: ExitProcess
  0x43e154: LoadLibraryW
  0x43e158: Sleep
  0x43e15c: HeapFree
  0x43e160: CloseHandle
  0x43e164: InitializeCriticalSection
  0x43e168: GetEnvironmentVariableW
  0x43e16c: SetEnvironmentVariableW
  0x43e170: GetCurrentProcess
  0x43e174: DuplicateHandle
  0x43e178: CreatePipe
  0x43e17c: GetStdHandle
  0x43e180: HeapAlloc
  0x43e184: CreateProcessW
  0x43e188: WaitForSingleObject
  0x43e18c: EnterCriticalSection
  0x43e190: LeaveCriticalSection
  0x43e194: MultiByteToWideChar
  0x43e198: FreeLibrary
  0x43e19c: CreateFileW
  0x43e1a0: WriteFile
  0x43e1a4: LoadLibraryA
  0x43e1a8: GetDriveTypeW
  0x43e1ac: FindFirstFileW
  0x43e1b0: FindClose
  0x43e1b4: GetFileAttributesW
  0x43e1b8: GetTempPathW
  0x43e1bc: SetFileAttributesW
  0x43e1c0: DeleteFileW
  0x43e1c4: GetLocalTime
  0x43e1c8: HeapReAlloc
  0x43e1cc: DeleteCriticalSection
  0x43e1d0: AllocConsole
  0x43e1d4: GetConsoleScreenBufferInfo
  0x43e1d8: SetConsoleCtrlHandler
  0x43e1dc: SetConsoleTitleW
  0x43e1e0: WideCharToMultiByte
[*] DLL: USER32.DLL
  0x43e1e8: EnumWindows
  0x43e1ec: GetWindowTextW
  0x43e1f0: CharLowerW
  0x43e1f4: GetActiveWindow
  0x43e1f8: WinHelpW
[*] DLL: SHELL32.DLL
  0x43e200: ShellExecuteExW
[*] DLL: WSOCK32.DLL
  0x43e208: closesocket
  0x43e20c: WSACleanup
  0x43e210: WSAStartup
  0x43e214: connect
  0x43e218: socket
  0x43e21c: inet_addr
  0x43e220: gethostbyname
  0x43e224: htons
  0x43e228: bind
  0x43e22c: ioctlsocket
  0x43e230: select
  0x43e234: __WSAFDIsSet
  0x43e238: send
  0x43e23c: sendto
  0x43e240: recvfrom
  0x43e244: recv
[*] DLL: NTDLL.DLL
p.p1 {margin: 0.0px 0.0px 0.0px 0.0px; font: 12.0px ‘Andale Mono’; color: #28fe14; background-color: #000000; background-color: rgba(0, 0, 0, 0.9)} span.s1 {font-variant-ligatures: no-common-ligatures; color: #34bbc8} span.s2 {font-variant-ligatures: no-common-ligatures}
  0x43e24c: ZwQuerySystemInformation
Reverse Engineering: Recursion in Bomb4.exe


    Function that calls itself
  •     May take the form of circular call relationship
  •     Determine what the base cases are.
  •     Example of when you might see recursion:
  •     Divide and conquer algorithms
  •     Sorting
  •     Tree or graph traversal, such as directory or file search
Here is the pseudocode:

    {
    int result; // eax@4
    int v2; // [esp+0h] [ebp-Ch]@1
    int v3; // [esp+8h] [ebp-4h]@1 v2 v2 = sscanf(Src, aD, &v3); if (
    if ( v2 != 1 || v3 < 1 )
    BombBlowupFunc(v2);
    result = fibonacci(v3); if (
    if ( result != 55 )
    BombBlowupFunc(1); return
    return result; }
    {
    int v2; // esi@3

    if ( a1 <= 1 )
    return 1;
    v2 = fibonacci(a1 – 1);
    return v2 + fibonacci(a1 – 2);
    }

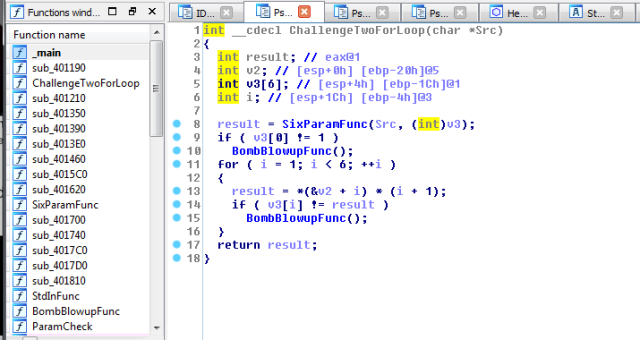
    Reverse Engineering Software: For Loop in Bomb2.exe


    I. Multiple/Variable Argument functions

    • sscanf
    • Highlight push before calls for context

    II. Array Access

    • Commonly found within for loops
    • General form: [base+count*increment]
    mov     eax, [ebp+arg_4] ; base
    add eax, 14h ; count*increment

    III. For Loop
    • 3-expressions for (i=0; i < 256; i++) {}
      • Initialization
      • Test
      • Counter
    • Note, all parts are optional.
    • In most (not all) cases there will be a common variable


    This is a classic for loop. Note the 3 parts of a for loop:

    • Initialization
    loc_4011D1:
    mov [ebp+var_4], 1
    jmp short loc_4011E3
    • Test expression
    loc_4011E3:
    cmp [ebp+var_4], 6
    jge short loc_401207
    • Counter
    loc_4011DA:
    mov edx, [ebp+var_4]
    add edx, 1
    mov [ebp+var_4], edx

    Reverse Engineering: Switch Cases in Bomb3.exe


    • Switch cases are compiled into different styles, depending on the compiler, optimization settings, and case values
      • may look like nested if..else if..else if..else..
      • may use a jump table array
    • For a jump table, the case is translated into an index within the table and multipled by the size of a pointer.
    mov     edx, [ebp+var_18]
    jmp ds:off_401328[edx*4]
    • Analysts are faced with many paths that are never visited
    • Understanding the input and desired output can help to avoid unnecessary analysis

    IDA Pro Tutorial: Unpacking Obfuscated Binary Using IDA Pro Debugger

    Source: hexrays.com
    Goal: Advance IDA Pro understanding
    Step: Load file using as Portable Executable for 80386 (metapc) reveals multiple errors and “Warning” tab informing about possible obfuscation routines.

    The following flags are checked out as well:

    • Rename DLL sections
    • Create import segment
    Picture

    The subroutine reveals the unresolvable jmp call to nowhere, as marked in red.
    Picture

    Now, we are loading the binary again with the same function using “Manual Load” and unchecking “Create segment section” to avoid at the segment error.

    Now, the jmp call leads to the function entitled “start_0.” 

    Picture

    Notably, the jmp call is the first instruction of this binary. In fact, it abused the header conventions by loading the code in these sections.

    We see that the binary loads a pointer into ESI which gets immediately copied to EBX:

    HEADER:00400158                 mov     esi, offset off_40601C
    HEADER:0040015D                 mov     ebx, esi
    HEADER:0040015F                 lodsd
    HEADER:00400160                 lodsd
    HEADER:00400161                 push    eax
    HEADER:00400162                 lodsd
    *Tip: Ctrl + O converts hexadecimals to labels

    Soon, the value of EBX is used to call a subroutine:
    HEADER:00400169            call    dword ptr [ebx]

    Picture

    At 0x40601C, the pointer offset off_40601C, or 40601Ch (in hexadecimals when pressed Ctrl+O for conversion) points to the memory location at 0x400130. To get to this point, we undefine the array (hotkey U), go back to the pointer (hotkey Esc) and follow the pointer again.

    While the function is now on screen, we only have half of it. It seems that the person who wrote that program wanted it to obfuscate it and separated the function into several pieces.

    Picture

    *Tip: There is a special command to help us: the command to generate flow charts of functions in IDA, it’s hotkey is F12.
    Picture

    Picture

    A quick glance at the flow chart reveals that there is only one exit from the function at its “ret” instruction ()
    First press F2 to create a breakpoint, then right click and select “edit breakpoint” to change it to a hardware breakpoint on the “execution” event.
    Picture

    ​After having set the breakpoint, we start the debugger by pressing F9. When we reach the breakpoint, the program will be unpacked into the ‘MEW’ segment. We jump there and convert everything to code (the fastest way to do this is to press F7 at the breakpoint)
    There are two things to be saved because they will disappear when the debugger stops: the memory contents and the imported function names. The memory contents can be saved by using the following 4-line script:
    auto fp, ea;
    fp = fopen(“bin”, “wb”);
    for ( ea=0x401000; ea < 0x406000; ea++ )
      fputc(Byte(ea), fp);

    If we want to know the name of the called function, we press Enter several times to follow the links and finally get the name:
    kernel32.dll:77E7AD86
    kernel32.dll:77E7AD86 kernel32_GetModuleHandleA:              ; CODE XREF: sub_4012DCj
    kernel32.dll:77E7AD86                                         ; DATA XREF: MEW:off_402000o
    kernel32.dll:77E7AD86 cmp     dword ptr [esp+4], 0

    We have to copy the function names before that:
    auto ea, name;
    for (ea = 0x401270; ea<0x4012e2; ea =ea+6 )
    {
      name = Name(Dword(Dfirst(ea)));               /* get name */
      name = substr(name, strstr(name, “_”)+1, -1); /* drop the prefix */
      MakeName(ea, name);
    }

    Now that we have run those scripts, we may stop the debugger (press Ctrl-F2) and copy back the memory contents. The “Load additional binary file” command in the File, Load menu is the way to go:

    Note that it is not necessary to create a segment, it already exists (clear the “create segments” flag). Also, the address is specified in paragraphs, i.e. it is shifted to the right by 4.

    Load the file, press P at 0x401000 and, you have a nice listing:

    Docker: Analysis Using Elasticsearch, Logstash & Kibana


    Source: https://hub.docker.com/r/sebp/elk/


    Goal: 

    • Collect, search and visualize log data with ELK (Elasticsearch 2.3.5, Logstash 2.3.4, Kibana 4.5.4).

    Steps:

    I. Setup ELK on localhost.

    (1) Obtain the ELK stack

    • sudo docker pull sebp/elk

    (2) Run the ELK stack

    • sudo docker run -p 5601:5601 -p 9200:9200 -p 5044:5044 -p 5000:5000 -it –name elk sebp/elk

    (3) Check Elasticsearch & Kibana status

      II. Load the data using Elasticsearch (Python dict struct data sent to Elasticsearch(http://localhost:9200/))
      III. Check index or pattern “*” in localhost:5601
      IV. Make sure the table is loaded to Kibana as it is shown below.
      V. Visualize it and create dashboards of choice.

      Memory Forensics: Stuxnet -> Volatility Analysis

      Sourcehttps://www.computersecuritystudent.com/FORENSICS/VOLATILITY/VOLATILITY2_2/lesson2/

      Basic Stuxnet Description (sophisticated APT worm-like trojan):

      1. A normal Windows XP installation has just one instance of lsass.exe that the Winlogon process creates when the system boots. (Wininit creates it on Windows Vista and higher).
      2. Process tree reveals that the two new lsass.exe instances were both created by services.exe, the Service Control Manager, which implies that Stuxnet somehow got its code into the Services.exe process.
      3. Mrxnet.sys is the driver that implements the rootkit that hides files, and Mrxcls.sys is a second Stuxnet driver file that launches the malware when the system boots. 
      2. vol.py  imageinfo=WinXPSP3x86 -f stuxnet.vmem

      Analyze Stuxnet Process Tree3. vol.py pstree –profile=WinXPSP3x86 -f stuxnet.vmem | egrep ‘(services.exe|lsass.exe|winlogon.exe)’ | tee pstree.txt
      Note 1: What is lsass.exe?

      • LSASS, or local security authority subsystem service, is a process that functions as part of the Microsoft Windows operating system.
        • LSASS is part of the process for maintaining and enforcing the security protocols on the operating system.
        • LSASS performs several important functions
          1. To ensure that the system remains free from unauthorized access
          2. LSASS oversees access to a computer or server.
          3. LSASS recognizes any restrictions on access to any information on the hard drive or the server.
          4. LSASS makes sure that only recognized access codes or other login credentials will allow persons to interact with password protected files, directories, etc.

      Note 2: Normal Parent-Child Relation vs. Student Parent-

      Child one

        • The normal Parent-Child relation
          • winlogon.exe (624) kicks off, DATE: 2010-10-29 17:08:54
            • services.exe (668), DATE: 2010-10-29 17:08:54
            • lsass.exe (680), 2010-10-29 17:08:54
        • The Stuxnet Parent-Child relation
          • services.exe(668) is NOT supposed to, but kicks off
            • lsass.exe (1928), DATE: 2011-06-03 04:26:55
            • lsass.exe (868), DATE: 2011-06-03 04:26:55
          • Notice these two lsass.exe processes were created 216 after winlogin.exe was started.

       Note 3: Lsass

      • Another way that you can tell the good lsass.exe (680) processes from the bad (1928 & 868) lsass.exe process is that PID 680 are bound to Port 500 and 4500, while PIDs 1928 & 868 are not.


      Analyze Sockets
      4. vol.py sockets –profile=WinXPSP3x86 -fstuxnet.vmem | egrep ‘(Off|—|680|1928|868)’ | tee images/sockets.txt

      Analyze DLLs

      • Analyze lsass DLLs​
      1. ./vol.py dlllist -p 680 –profile=WinXPSP3x86 -f stuxnet.vmem 2>/dev/null | wc -l
      2. ./vol.py dlllist -p 1928 –profile=WinXPSP3x86 -f stuxnet.vmem 2>/dev/null | wc -l
      3. ./vol.py dlllist -p 868 –profile=WinXPSP3x86 -f stuxnet.vmem 2>/dev/null | wc -l
      4. ./vol.py dlllist -p 680,1928,868 –profile=WinXPSP3x86 -f stuxnet.vmem > dlllist.txt
      5. ls -l dlllist.txt


      Note 4: Lsass DLLsAnother suspicious characteristic of the two superfluous processes is the fact that they have very few DLLs loaded. 
      DLLs are automatically added … when a process call the LoadLibrary.
      Notice that the good PID (680) has 64 DLLs attached to its’ process.
      Notice that the bad PID (1928) has 35 DLLs attached to its’ process.
      Notice that the bad PID (868) has 15 DLLs attached to its’ process.

      Analyze Process IDs with malfind

      vol.py malfind -p 680 –profile=WinXPSP3x86 -f images/stuxnet/stuxnet.vmem
      vol.py malfind -p 868 –profile=WinXPSP3x86 -f images/stuxnet/stuxnet.vmem
      vol.py malfind -p 868,1928 –profile=WinXPSP3x86 -f images/stuxnet/stuxnet.vmem > images/stuxnet/output/malfind.txt

      Note:

      • The malfind command has several purposes. You can use it to find hidden or injected code/DLLs in user mode memory, based on characteristics such as VAD tag and page permissions. 
      • Services.exe, Lsass.exe or Explorer.exe should not have write permission. 
      • Notice, that PID(680) did not return any results, while PID (868 and 1928) did.


      Bypassing Behavior Blocking When Loading DLLs

      1. What is Address space layout randomization (ASLR)
      Address space layout randomization (ASLR) is a computer security method which involves randomly arranging the positions of key data areas, usually including the base of the executable and position of libraries, heap, and stack, in a process’s address space.

      2. Bypassing Behavior Blocking When Loading DLLs
      Whenever Stuxnet needs to load a DLL, including itself, it uses a special method designed to bypass behavior-blocking and host intrusion-protection based technologies that monitor LoadLibrary calls. Stuxnet calls LoadLibrary with a specially crafted file name that does not exist on disk and normally causes LoadLibrary to fail. However, W32.Stuxnet has hooked Ntdll.dll to monitor for requests to load specially crafted file names. These specially crafted filenames are mapped to another location instead a location specified by W32.Stuxnet. That location is generally an area in memory where a .dll file has been decrypted and stored by the threat previously. The filenames used have the pattern of KERNEL32.DLL.ASLR.[HEXADECIMAL] or SHELL32.DLL.ASLR. [HEXADECIMAL], where the variable [HEXADECIMAL] is a hexadecimal value.

      vol.py dlllist –profile=WinXPSP3x86 -f stuxnet.vmem | grep ASLR
      vol.py dlllist –profile=WinXPSP3x86 -f stuxnet.vmem | grep ASLR > aslr.txt
      ls -l images/stuxnet/output/aslr.txt

      ​Displays the Stuxnet specially crafted files designed to bypass the ASRL.

      Using ldrmodules to find hidden DLLs


      Note (FYI):

      There are many ways to hide a DLL. One of the ways involves unlinking the DLL from one (or all) of the linked lists in the PEB (Process Environment Block). However, when this is done, there is still information contained within the VAD (Virtual Address Descriptor) which identifies the base address of the DLL and its full path on disk. To cross-reference this information (known as memory mapped files) with the 3 PEB lists, use the ldrmodules command. For each memory mapped Portable Executable (PE) file, the ldrmodules command prints a 0 or a 1 if the PE exists in the PEB lists.

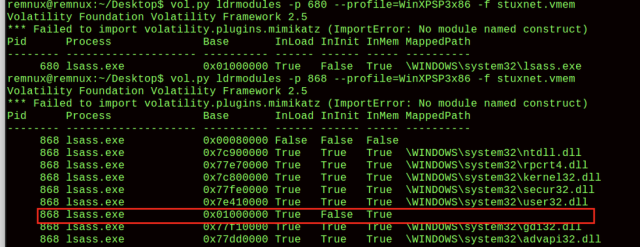
      a. vol.py ldrmodules -p 680 –profile=WinXPSP3x86 -f images/stuxnet/stuxnet.vmem
      This is normal

      b. vol.py ldrmodules -p 868 –profile=WinXPSP3x86 -f images/stuxnet/stuxnet.vmem

      Notice the lines identified by the word “Problem.”c. vol.py ldrmodules -p 1928 –profile=WinXPSP3x86 -f images/stuxnet/stuxnet.vmem | egrep ‘(Pid|-$)’

      ​Note (FYI):
      The lines identified as a problem are either suspicious because an entry is missing from one of the PEB (Process Environment Block) lists or because the path name is blank.

      Using procexedump to dump process executables
      Note (FYI):

      • To dump a process’s executable (not including the slack space), use the procexedump command.

      1. vol.py procdump -p 680,868,1928 -D ./output/ –profile=WinXPSP3x86 -f stuxnet.vmem
      2. ls -l output/*.exe